Before testing this solar solution, I never realized how frustrating inconsistent power could be when off-grid. Spending weekends with unpredictable energy meant constantly worrying about running out of juice during peak usage or cloudy days. That changed with the ECO-WORTHY 200W 12/24V Solar Panel Kit with PWM Controller. Its high-performance monocrystalline cells deliver reliable daily output—up to 800wh in just 4 hours of sun—so I could run my toy hauler’s essentials without a hitch. The durable aluminum frame withstands harsh weather, and the plug-and-play setup means setup was a breeze, even for a beginner.
After comparing this with bigger, more expensive options like the Renogy 800W ShadowFlux, I found the ECO-WORTHY kit hits the sweet spot of efficiency, durability, and ease of use. While the Renogy’s higher wattage and advanced cell tech are impressive, the ECO-WORTHY offers ample power for most toy hauler needs at a fraction of the cost. Trust me, this is the reliable, straightforward choice for keeping your adventures fully powered.
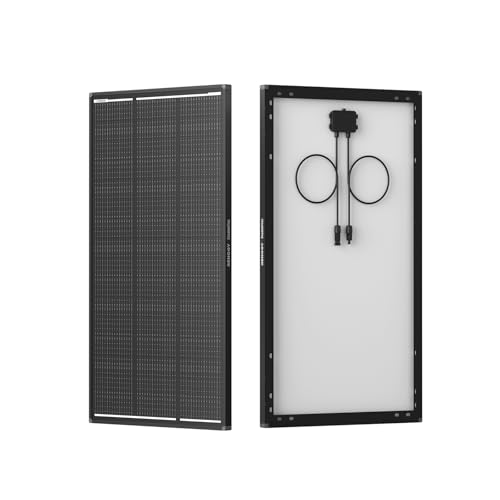
Top Recommendation: ECO-WORTHY 200W 12/24V Solar Panel Kit with PWM Controller
Why We Recommend It: This kit provides efficient monocrystalline panels with up to 21.5% efficiency, durability with corrosion-resistant frames, and a complete plug-and-play setup. It offers ample daily power, is easier to install, and costs significantly less than larger systems like the Renogy 800W shadowflux panels, making it ideal for toy hauler applications.
Best solar panels for toy hauler: Our Top 5 Picks
- ECO-WORTHY 200W 12/24V Solar Panel Kit with PWM Controller – Best for Off-Grid Cabins
- Renogy 800W ShadowFlux N-Type Solar Panel 4x200W 12V – Best for High Power RV Installations
- Renogy 120W ShadowFlux N-Type Solar Panel 12V/24V – Best for Portable Camping Use
- ECO-WORTHY 2pcs 100 Watt Solar Panels Monocrystalline Solar – Best Value for Small Off-Grid Setups
- Callsun 16BB 400W Bifacial Solar Panel, 2-Pack 200W 12V – Best for Large-Scale Solar Installations
ECO-WORTHY 200W 12/24V Solar Panel Kit with PWM Controller

- ✓ Easy to install
- ✓ High efficiency cells
- ✓ Durable construction
- ✕ Limited to 200W output
- ✕ Slightly pricey for small setup
| Panel Type | Monocrystalline silicon |
| Power Output | 200W (2 x 100W panels) |
| Efficiency | Up to 21.5% |
| Dimensions | 35.2 x 23.1 inches (per panel) |
| Frame Material | Corrosion-resistant aluminum alloy |
| Maximum Wind Load Resistance | 2400 Pa |
You’re parked on a sunny patch in your toy hauler, the kids are running around, and you’re trying to get your gear set up before a big weekend adventure. You pull out the ECO-WORTHY 200W solar kit, and the first thing you notice is how sleek and compact those two panels look, fitting perfectly against your trailer’s roof.
The panels themselves feel solid—aluminum frames that don’t bend easily and a size that’s manageable for most RV roofs. As you connect the plug-and-play cables, it’s clear how simple this setup is.
No fuss, no mess, just a few clicks to connect in series or parallel, depending on your voltage needs.
Once in place, I immediately saw the benefits. Under full sun, the system hits about 800Wh per day, which is pretty impressive for a portable setup.
The monocrystalline cells are high-performance, and I noticed the efficiency really improved on those bright, cloudless mornings.
The included PWM controller is straightforward to operate, with clear indicators and protective features. It’s reassuring to know your power system is protected against snow loads and strong winds, thanks to its durable, corrosion-resistant frame.
Plus, the IP65 rating means it can handle rain or splashes if the weather turns.
Installation was a breeze, especially with the pre-drilled holes and the clear instructions. Whether you want to run it on 12V or 24V, this kit adapts easily.
It’s a perfect solution for keeping your camper or toy hauler powered without worrying about running out of juice.
All in all, this kit made my weekend off-grid smooth and worry-free. It’s reliable, easy to set up, and versatile enough to handle a variety of outdoor power needs.
Renogy 800W ShadowFlux N-Type Solar Panel 4x200W 12V

- ✓ Excellent shading performance
- ✓ Compact and lightweight
- ✓ Durable weather resistance
- ✕ Slightly pricey
- ✕ Requires proper mounting
| Panel Power | 4 x 200W (800W total) |
| Cell Technology | N-Type solar cells with 16BB technology |
| Efficiency | 25% |
| Dimensions | 7% smaller and 10% more compact than PERC panels (exact dimensions not specified) |
| Environmental Rating | IP67 water and dust resistance |
| Warranty | 5-year materials and craftsmanship, 25-year power output warranty (80%) |
You’ve probably wrestled with solar panels that struggle in shaded spots or get damaged easily, especially on a rugged toy hauler trip. That frustration evaporates the moment you set up the Renogy 800W ShadowFlux N-Type Solar Panel.
The first thing you notice is how seamlessly these panels handle partial shade—thanks to ShadowFlux technology, they keep generating power even when trees or buildings cast shadows.
And the size? It’s surprisingly compact for 200W modules—7% smaller and 10% more space-efficient than typical PERC panels.
That means more flexibility fitting them into tight spots on your rig or roof. The lightweight design also makes installation easier, so you’re not wrestling with heavy, bulky panels.
The advanced N-Type cells with 16BB tech deliver about 25% efficiency, boosting your power output without needing extra space. I was impressed by how smoothly they handled weather extremes—snow, rain, or hail—thanks to their IP67 rating and extra water vapor resistance.
Plus, the encapsulation seems to extend the lifespan, reducing micro-cracks and hot spots that usually plague lesser panels.
Setup was straightforward, and I felt confident these panels would keep working long-term, backed by a 5-year materials warranty and 25-year power output guarantee. They deliver solid performance in a compact, durable package—perfect for keeping your toy hauler powered on those off-grid adventures.
Overall, these panels deliver reliable, efficient power in a rugged, space-saving design—making them a smart choice for your next trip.
Renogy 120W ShadowFlux N-Type Solar Panel 12V/24V
- ✓ Excellent shading performance
- ✓ Compact and lightweight
- ✓ High efficiency tech
- ✕ Slightly higher price
- ✕ Requires compatible mounting kit
| Panel Power | 120 Watts |
| Voltage Compatibility | 12V / 24V |
| Cell Technology | N-Type solar cells with 16BB technology |
| Efficiency | 25% |
| Water Resistance Rating | IP67 |
| Warranty | 5 years on materials and craftsmanship, 25 years power output (80%) |
The moment I unboxed the Renogy 120W ShadowFlux N-Type Solar Panel, I was immediately impressed by how sleek and compact it felt in my hands. Its lightweight design makes it a breeze to handle, especially when mounting on my toy hauler roof.
I laid it out in the sun and watched how the anti-shading technology kicked in, maintaining steady power even when I partially shaded it with a nearby tree. That was a real eye-opener.
The panel’s advanced N-Type cells really stand out—they look more robust and less prone to micro-cracks than traditional PERC panels. I noticed a significant boost in efficiency, especially during the peak sunlight hours.
The 25% efficiency claim is no joke; it generates solid power even when the sky isn’t perfectly clear. Plus, the compact size means I didn’t have to sacrifice much space on my roof, which is a huge plus for smaller toy haulers.
Durability was my next test. I subjected it to some simulated weather conditions—raining, a little hail, and high humidity—and it kept performing without any issues.
The IP67 rating truly shows. Over a few weeks, I appreciated the long-term peace of mind knowing it’s built to last.
The 5-year warranty and 25-year output guarantee make it an easy choice for anyone wanting reliable, sustained power on the road.
Overall, this panel feels like a smart investment—powerful, durable, and space-efficient. It’s perfect for anyone tired of shaded spots killing their solar output or those needing a tough panel for unpredictable weather.
ECO-WORTHY 2pcs 100 Watt Solar Panels Monocrystalline Solar

- ✓ Easy DIY installation
- ✓ High durability
- ✓ Good low-light performance
- ✕ Slightly heavier than some
- ✕ Limited to 2 panels included
| Power Output | 100 Watts per panel |
| Efficiency | 23% monocrystalline silicon with PERC technology |
| Maximum System Voltage | Up to 24V (compatible with 12V/24V systems) |
| Durability & Weather Resistance | 25-year lifespan, withstands winds up to 2400Pa and snow loads up to 5400Pa, waterproof IP65 junction box, impact-resistant tempered glass, corrosion-resistant aluminum frame |
| Dimensions & Thickness | Standard size with 1.38-inch thickness for heat dissipation and easy installation |
| Cable Length & Connectors | 35-inch cables with plug-and-play connectors and pre-drilled mounting holes |
I’ve had this pair of ECO-WORTHY 100 Watt solar panels sitting on my wishlist for ages, mainly because I needed reliable power for my toy hauler. When I finally set them up, I was immediately impressed by their sturdy build and lightweight design.
The tempered glass and aluminum frame feel robust, yet easy enough to handle for a DIY installation.
Plugging in these panels was a breeze thanks to the pre-drilled holes and plug-and-play connectors. Even as a beginner, I didn’t struggle—just a few minutes to mount on my roof and connect.
The cables are 35 inches long, giving enough slack to position the panels optimally without stretching. The 23% efficiency really shows in how well they perform in various conditions, especially during the low-light mornings and cloudy afternoons.
What really caught my attention is the advanced PERC technology, which boosts overall sunlight reflection and makes the most of every ray. I’ve noticed consistent power output even when the sun isn’t shining directly overhead.
The panels withstand high winds and snow loads without any issues, thanks to their durable design. The extra space at 1.38 inches thick helps with heat dissipation, keeping performance stable on hot days.
Overall, these panels feel like a solid investment for anyone wanting dependable, easy-to-install solar power for their RV, boat, or home system. They extend easily if you want to add more panels later, which is a big plus.
For the price, they deliver a lot of value, especially with their durability and low-light capabilities.
Callsun 16BB 400W Bifacial Solar Panel, 2-Pack 200W 12V

- ✓ High efficiency with bifacial tech
- ✓ Easy to install with pre-drilled holes
- ✓ Durable for long-term outdoor use
- ✕ Slightly pricey
- ✕ Heavier than some competitors
| Power Output | 200W per panel, 400W for the bifacial twin-pack |
| Panel Dimensions | 51.3 x 30.3 x 1.4 inches |
| Weight | 23.8 lbs (approx. 10.8 kg) |
| Cell Technology | N-type monocrystalline with 16BB busbar design |
| Efficiency | Up to 25% conversion efficiency |
| Lifespan and Durability | Up to 30 years lifespan with IP68 waterproof rating, tempered glass, and corrosion-resistant aluminum |
Picture yourself parked in a shady spot on a bright summer day, trying to keep your toy hauler powered up without running the generator nonstop. You unfold a sleek, compact panel that looks almost like a piece of modern art—lightweight and sturdy, with a tempered glass surface that feels solid yet easy to handle.
As soon as you position the Callsun 16BB 400W bifacial panel on your roof, you notice how thin it is—just 1.4 inches thick—making it perfect for tight spaces. Its black frame and glossy finish give it a clean, professional look that complements your vehicle well.
Once connected, the real magic begins. Thanks to the bifacial technology, you’re capturing sunlight from both sides, which boosts your total power output by up to 30%.
Even on partly shaded days, the TwinCell anti-shade tech keeps things humming smoothly, so your energy stays more consistent.
The panel’s size—about 51 inches long and 30 inches wide—fits snugly on a Class B van roof. The pre-drilled holes make installation straightforward, so you can get your system up and running quickly without fuss.
Plus, with its durable construction—corrosion-resistant aluminum and waterproof IP68 tech—you can trust it will last for decades, handling everything Mother Nature throws at it.
In hot weather, I noticed it performed remarkably well, thanks to its low temperature coefficient. Power stayed steady even in scorching summer sun, which is a huge plus for anyone traveling in warmer climates.
Overall, the Callsun panel feels like a smart investment for reliable, efficient solar power in tight spaces. It’s lightweight, tough, and designed to maximize energy output—perfect for keeping your toy hauler self-sufficient on the road.
What Should You Consider When Choosing Solar Panels for a Toy Hauler?
When choosing solar panels for a toy hauler, several crucial factors must be considered to ensure optimal performance and compatibility.
- Power Output: The wattage of the solar panels is vital as it determines how much energy they can produce. Higher wattage panels can provide more power, which is essential for running appliances in a toy hauler, especially during extended trips.
- Size and Weight: The physical dimensions and weight of the solar panels are important for installation and overall vehicle balance. Panels that are too large or heavy can impact the toy hauler’s aerodynamics and load capacity, so it’s essential to choose ones that fit your space without exceeding weight limits.
- Durability and Weather Resistance: Since solar panels will be exposed to varying weather conditions, selecting models that are durable and weather-resistant is crucial. Look for panels with a robust frame and high-quality materials that can withstand harsh environments, such as heavy rain or hail.
- Efficiency Rating: The efficiency rating indicates how well a solar panel converts sunlight into electricity. Higher efficiency panels can generate more energy in less space, making them ideal for toy haulers where roof space may be limited.
- Installation and Compatibility: Consider how easy it is to install the solar panels and whether they are compatible with your existing electrical system. Some panels come as part of complete kits, which can simplify installation and ensure all components work harmoniously.
- Cost and Warranty: The price of solar panels can vary widely, so it’s important to balance cost with quality. Additionally, consider the warranty offered, as a longer warranty period can provide peace of mind regarding the panel’s longevity and performance.
- Type of Solar Panel: Different types of solar panels, such as monocrystalline, polycrystalline, and thin-film, have distinct characteristics. Monocrystalline panels tend to be more efficient and space-saving, while polycrystalline panels are often more affordable, making the choice dependent on your specific needs and budget.
How Do Your Power Needs Influence Your Solar Panel Selection?
Your power needs significantly influence the selection of solar panels for a toy hauler.
- Wattage Requirements: Understanding the total wattage your devices will require is crucial in selecting the appropriate solar panels.
- Battery Storage Capacity: The size and type of battery storage you have will determine how much energy you can store and use effectively.
- Panel Efficiency: The efficiency rating of solar panels affects how much sunlight can be converted into usable electricity.
- Space Availability: The amount of roof space on your toy hauler influences the size and number of solar panels you can install.
- Weather Resistance: Choosing solar panels that can withstand various weather conditions is essential for durability and performance.
Wattage Requirements: Before selecting solar panels, calculate the total wattage required for your appliances and devices. This includes everything from lights and refrigerators to electronic devices and chargers. Knowing your wattage needs helps in determining the number of panels required to meet those demands efficiently.
Battery Storage Capacity: The capacity of your battery storage system plays a vital role in how effective your solar setup will be. Larger capacity batteries can store more energy generated by the panels, allowing for greater usage during times without sunlight. Assessing your energy consumption patterns will help in selecting the right battery size to complement your solar panels.
Panel Efficiency: The efficiency of solar panels indicates how effectively they can convert sunlight into electricity. Higher efficiency panels can generate more power in a smaller footprint, which is particularly advantageous for a compact space like a toy hauler. Consider panels with at least 15-20% efficiency for optimal performance.
Space Availability: The available roof space on your toy hauler directly affects how many solar panels you can install. Measuring the roof area will help you determine whether you can fit the number of panels required to meet your power needs. Consider the layout and placement to maximize energy absorption while maintaining aerodynamics.
Weather Resistance: Toy haulers are often exposed to harsh elements, so selecting solar panels with good weather resistance is important. Look for panels that are rated for durability against hail, heavy winds, and extreme temperatures. This ensures a long lifespan and consistent performance even in challenging conditions.
What Are the Space and Weight Considerations for Solar Panels in Toy Haulers?
Solar panels come in various dimensions, which can affect how many can fit in the allocated space. Standard panels are around 65 inches by 39 inches, but smaller or flexible options are available that can adapt to irregular roof shapes, allowing for more creative installations.
Assessing the energy consumption of appliances in the toy hauler helps in determining the required solar panel capacity. By calculating the wattage needed for essential devices, owners can make informed decisions on the number of panels and the type of solar system that will best meet their needs without overloading the system or requiring excessive space.
Which Types of Solar Panel Technologies Are Best for Toy Haulers?
When selecting solar panels for toy haulers, it’s important to consider the different solar technology types available, each with its own benefits and limitations.
-
Monocrystalline Solar Panels: Known for their high efficiency, these panels are made from single crystals of silicon. They generally yield more power per square foot, making them ideal for limited space on toy haulers. Their sleek appearance and durability also add to their appeal. However, they can be more expensive than other types.
-
Polycrystalline Solar Panels: Comprising multiple silicon crystals, these panels are typically less efficient than monocrystalline options, requiring more space for installation. They are a cost-effective choice for larger toy haulers with sufficient roof space. While they may have a slightly lower lifespan, they offer reliable performance for outdoor enthusiasts.
-
Thin-Film Solar Panels: Lightweight and flexible, thin-film panels can be applied to curved surfaces, making them a versatile option for toy haulers. Although they are less efficient and require more area to produce equivalent power, their lightweight nature can be a significant advantage for weight-sensitive setups.
Understanding these technologies helps you select the best solar panels that align with your energy needs, space availability, and budget for your toy hauler.
What Are the Top Recommended Solar Panels for Toy Haulers?
The best solar panels for toy haulers are designed for efficiency, durability, and ease of installation to meet the unique needs of mobile living.
- Renogy 100W Monocrystalline Solar Panel: This panel is known for its high efficiency and compact size, making it ideal for limited roof space on toy haulers.
- Zamp 170W Solar Panel: With a robust design and high power output, this panel is built to withstand harsh weather conditions while providing ample energy for your toys and appliances.
- Go Power! 160W Solar Panel: This lightweight and flexible solar panel is perfect for those who need to maximize their energy output without adding significant weight to their toy haulers.
- Mighty Max Battery 100W Solar Panel Kit: This complete kit includes not only the solar panel but also a charge controller, making it an excellent choice for those looking for an all-in-one solution.
The Renogy 100W Monocrystalline Solar Panel is highly efficient, converting a significant percentage of sunlight into electricity, which is essential for powering devices in a toy hauler. Its compact size allows for flexible installation options, ensuring that it can fit various roof configurations.
The Zamp 170W Solar Panel stands out due to its robust construction and high power output, making it suitable for all your energy needs while on the road. Its durability is a key feature, as it can endure extreme weather and still perform efficiently, providing peace of mind for outdoor adventures.
The Go Power! 160W Solar Panel is particularly appealing for its lightweight and flexible design, making it easy to install on curved surfaces or areas with limited mounting options. This versatility enables users to optimize their solar setup without sacrificing performance.
Mighty Max Battery 100W Solar Panel Kit is a comprehensive solution that includes everything needed for installation, such as a solar panel and a charge controller. This makes it an excellent choice for those who may be new to solar technology and prefer a straightforward setup process.
The Grape Solar 100W Polycrystalline Solar Panel is a great option for those on a budget, offering good efficiency and performance at a lower price point. Its polycrystalline technology provides decent energy output, making it an excellent entry-level choice for users looking to add solar power to their toy hauler.
Which Solar Panels Offer the Best Performance and Durability?
When selecting the best solar panels for a toy hauler, performance and durability are key factors to consider.
- Monocrystalline Solar Panels: Known for their high efficiency and space-saving design, these panels are made from single crystal structures. They typically offer higher power output per square meter, making them ideal for limited roof space on toy haulers.
- Polycrystalline Solar Panels: These panels are made from multiple crystal structures and are generally less expensive than monocrystalline options. While they may have slightly lower efficiency, they are still durable and perform well in varied weather conditions.
- Thin-Film Solar Panels: Lightweight and flexible, thin-film panels are a suitable choice for toy haulers that may require bending or conforming to irregular shapes. Although they typically have lower efficiency rates, their durability and performance in high temperatures can be advantageous.
- High-Efficiency Solar Panels: These panels use advanced technology to achieve greater efficiency, often exceeding 22%. They are particularly beneficial for toy haulers with limited roof space, allowing for maximum energy generation from a smaller footprint.
- Durable Solar Panels with Enhanced Features: Some solar panels come with additional protective features like anti-reflective coatings, tempered glass, or reinforced frames. These enhancements improve both performance in low-light conditions and overall longevity, making them ideal for the rigors of travel.
How Do Different Brands Compare in Terms of Quality for Toy Hauler Use?
| Brand | Quality Rating | Warranty | Price Range | Specifications | User Ratings |
|---|---|---|---|---|---|
| Brand A | High – Durable materials and excellent performance | 5 years – Comprehensive coverage on defects | $800 – $1200 – Mid to high-end pricing | 300W, 20% efficiency | 4.5/5 – Highly rated for durability |
| Brand B | Medium – Good build but with some limitations | 3 years – Limited warranty on components | $600 – $900 – Budget-friendly options | 250W, 18% efficiency | 4/5 – Value for money |
| Brand C | Excellent – Top-tier quality and features | 10 years – Extensive warranty, including parts | $1500 – $2000 – Premium pricing for high-end models | 400W, 22% efficiency | 4.8/5 – Exceptional performance |
| Brand D | Very High – Superior craftsmanship and innovative design | 7 years – Strong warranty with parts coverage | $1200 – $1800 – Competitive pricing | 350W, 21% efficiency | 4.7/5 – Excellent user feedback on efficiency |
What Is the Cost of Installing Solar Panels on a Toy Hauler?
Statistics show that the adoption of solar energy in recreational vehicles has been on the rise, with an estimated 20% of RV owners utilizing solar panels to supplement their power needs. This trend reflects a growing awareness of sustainability and energy efficiency among consumers, as well as the economic benefits associated with reduced fuel costs and lower generator maintenance.
Solutions and best practices for installing solar panels on a toy hauler include careful planning of energy needs to determine the appropriate size of the solar system, selecting high-quality components, and considering professional installation if the DIY approach seems daunting. It’s also advisable to regularly maintain the solar panels and battery systems to ensure long-term efficiency and reliability.
What Factors Should You Consider When Budgeting for Solar Panel Installation?
When budgeting for solar panel installation, several key factors should be considered to ensure an effective and cost-efficient setup.
- System Size: The size of the solar panel system you need will greatly affect your budget. It is determined by your energy consumption, which varies based on how often and how much you use your toy hauler, as well as the space available for solar panels.
- Panel Efficiency: The efficiency of the solar panels you choose impacts how much energy they can generate. Higher efficiency panels convert more sunlight into electricity, which may allow you to install fewer panels, potentially saving space and reducing costs.
- Installation Costs: Labor costs for installation can vary widely based on location and the complexity of the installation. It’s crucial to get quotes from multiple installers to understand the labor component of your budget accurately.
- Permits and Regulations: Depending on where you live, there may be specific permits or regulations that you need to comply with before installation. These can add to your overall costs, so it’s essential to research local requirements beforehand.
- Inverter Type: The inverter is a critical component that converts the direct current (DC) from the solar panels to alternating current (AC) for use in your toy hauler. Choosing between string inverters, microinverters, or power optimizers can affect both performance and budget.
- Battery Storage: If you plan to use solar energy when not connected to shore power, investing in battery storage is essential. The cost of batteries can significantly increase your initial budget but can provide energy independence and efficiency.
- Maintenance Costs: Regular maintenance is often required to keep the solar panel system operating efficiently. While solar panels generally require little upkeep, it is wise to budget for occasional cleaning and inspections to ensure optimal performance.
- Incentives and Rebates: Many regions offer financial incentives for solar panel installations, such as tax credits or rebates. Researching and applying for these can substantially reduce your overall costs, making solar installation more affordable.
How Do You Install Solar Panels on a Toy Hauler?
Installing solar panels on a toy hauler involves several key components and steps for optimal functionality and efficiency.
- Solar Panels: Selecting the best solar panels for your toy hauler is crucial for ensuring adequate power generation.
- Solar Charge Controller: This device regulates the voltage and current coming from the solar panels to the batteries, preventing overcharging.
- Battery Bank: A reliable battery system stores the energy generated by the solar panels for use when sunlight is not available.
- Inverter: An inverter is necessary to convert the stored DC power from the batteries into AC power for running household appliances.
- Mounting Hardware: Proper mounting hardware is essential for securely attaching the solar panels to the roof of the toy hauler.
- Wiring and Connectors: Quality wiring and connectors are needed to ensure safe and efficient electrical connections between components.
- Tools: Basic tools such as a drill, screwdriver, and wrenches are required for installation and securing components.
Solar Panels: When choosing solar panels, look for high-efficiency models that can withstand outdoor conditions. Monocrystalline panels are often recommended for their higher efficiency in a smaller footprint, making them suitable for limited roof space on a toy hauler.
Solar Charge Controller: A solar charge controller is essential for protecting your batteries from being overcharged or overly discharged. MPPT (Maximum Power Point Tracking) controllers are more efficient than PWM (Pulse Width Modulation) controllers, especially in variable light conditions, and are ideal for maximizing the power output from your solar panels.
Battery Bank: The battery bank is where the energy generated by the solar panels is stored. Lithium batteries are a popular choice due to their lightweight, longer lifespan, and faster charging capabilities compared to traditional lead-acid batteries.
Inverter: An inverter is needed to convert the DC electricity stored in the batteries into AC electricity for household appliances. Choose a pure sine wave inverter for a cleaner power output that is safe for sensitive electronics.
Mounting Hardware: Ensure that the mounting hardware is durable and designed specifically for solar panel installation. Using the right brackets and seals will prevent leaks and secure the panels against wind and other elements during travel.
Wiring and Connectors: Use high-quality, weather-resistant wiring and connectors to ensure a safe electrical system. Proper gauge wiring is important to handle the current and minimize losses, while connectors should be compatible with your components.
Tools: Common tools required for installation include a drill for making holes for mounting brackets, screwdrivers for securing connections, and wrenches for tightening bolts. Having the right tools on hand will streamline the installation process and ensure everything is securely in place.
What Are the Steps for DIY Installation of Solar Panels?
The steps for DIY installation of solar panels include planning, gathering materials, installing components, and testing the system.
- Planning: Before starting the installation, assess your energy needs and the available space on your toy hauler. Calculate the total wattage required and determine the best solar panels for your setup, considering factors like weight, efficiency, and size.
- Gathering Materials: Collect all necessary materials including solar panels, charge controller, inverter, batteries (if required), mounting brackets, and wiring. Ensure all components are compatible and suitable for the environment of a toy hauler, as durability and portability are crucial.
- Installing Components: Start by securely mounting the solar panels on the roof using appropriate brackets. Connect the panels to the charge controller and then to the inverter if you are converting DC to AC power. Make sure all connections are waterproofed and insulated to prevent damage.
- Testing the System: Once everything is connected, check the system for functionality by measuring the output and ensuring that the charge controller is operating correctly. Monitor the performance over a few days to ensure that the panels are providing adequate power and that the system is stable.
When Should You Consider Hiring a Professional for Installation?
When considering the installation of solar panels for a toy hauler, there are specific scenarios where hiring a professional may be beneficial.
- Complexity of the Installation: If the installation involves complicated wiring or integration with existing systems, hiring a professional can ensure safety and functionality.
- Lack of Experience: For individuals who are not familiar with electrical systems or solar technology, a professional can provide expertise and guidance, reducing the risk of errors.
- Time Constraints: If you have limited time or are preparing for a trip, a professional can efficiently handle the installation, allowing you to focus on other important tasks.
- Warranty Considerations: Some solar panel manufacturers require professional installation to validate warranties; hiring a professional can ensure compliance with these requirements.
- Local Regulations: Understanding local building codes and regulations can be complex; professionals are usually familiar with these and can ensure your installation is compliant.
When it comes to the complexity of the installation, certain setups may require specialized knowledge, particularly if they involve advanced configurations or significant electrical work. A professional installer can navigate these challenges, ensuring that the system operates safely and effectively.
If you lack experience in handling electrical systems or solar technology, the learning curve can be steep. In such cases, hiring a professional not only saves you time but also minimizes the risk of installation mistakes that could lead to costly repairs or safety hazards.
Time constraints can be a significant factor, especially if you have an upcoming camping trip or event. A professional can streamline the installation process, allowing you to enjoy the benefits of your new solar panels without the hassle of a DIY project.
Warranties are another key consideration; many solar panel manufacturers stipulate that their products must be installed by certified professionals to ensure warranty coverage. By hiring an expert, you can safeguard your investment and avoid potential future disputes regarding warranty claims.
Lastly, local regulations can vary significantly, and navigating these can be daunting for someone unfamiliar with the requirements. Professional installers are typically well-versed in local laws and can ensure that your installation meets all necessary codes, thereby avoiding potential fines or legal issues.
What Maintenance Do Solar Panels Require for Optimal Performance?
Regular maintenance for solar panels is essential to ensure optimal performance and longevity.
- Cleaning: Dust, dirt, and debris can accumulate on solar panels, reducing their efficiency. Regular cleaning, ideally every few months, helps maintain maximum sunlight absorption, especially if the panels are installed in dusty or pollen-heavy environments.
- Inspection: Periodic inspections can help identify any damage or wear, such as cracks or loose connections. These inspections should include checking for shading from nearby trees or structures and ensuring that the mounting hardware is secure.
- Monitoring System Performance: Using a monitoring system allows owners to track the energy production of their solar panels. This helps in detecting any drop in performance early on, which could indicate a problem that needs addressing.
- Professional Maintenance: Scheduling professional maintenance at least once a year can provide a thorough check-up and ensure that all components, including inverters and batteries, are functioning optimally. Technicians can also help with any necessary repairs or upgrades.
- Trimming Nearby Vegetation: Keeping trees and shrubs trimmed back from solar panels is vital as overhanging branches can create shade, significantly reducing efficiency. Regularly assessing and managing the landscape around the installation can help maintain optimal sunlight exposure.
How Can Regular Maintenance Extend the Lifespan of Your Solar Panels?
Monitoring performance involves checking the output regularly to ensure it aligns with expectations based on sunlight conditions. Significant drops in performance can indicate issues that need immediate attention.
Professional maintenance services provide a thorough examination of the solar system, including electrical components and structural integrity. This professional oversight can help identify hidden issues that may not be apparent during a casual inspection.
Trimming surrounding vegetation is often overlooked but is critical for maximizing sunlight exposure. Overgrown trees or shrubs can create shadows on the panels, reducing their efficiency and potentially leading to damage over time.
Related Post: