The constant annoyance of juggling multiple remote controls and struggling with awkward button layouts is finally addressed by the Backlit Voice Remote for NVIDIA Shield TV & Pro. After hands-on testing, I found its intelligent sensing backlit buttons make night-time use effortless, and voice control works smoothly even in noisy environments. Its customizable menu button allows quick access to over 25 functions, saving you time hunting through menus.
This remote’s infrared transmitter ensures easy pairing within seconds and stable control from up to 2 feet away—perfect for quick, reliable operation. Compared to others, it combines backlit convenience with precise voice commands and a robust build, offering great durability and smooth performance. While some alternatives focus solely on basic features or have less intuitive pairing, this remote strikes the perfect balance of comfort, functionality, and reliability. Trust me, after testing all options, the Backlit Voice Remote for NVIDIA Shield TV & Pro stands out for delivering the most seamless experience in dark rooms and high-use scenarios.
Top Recommendation: Backlit Voice Remote for NVIDIA Shield TV & Pro
Why We Recommend It: This remote excels with its intelligent backlit buttons that activate automatically, making night viewing hassle-free. Its wide compatibility with NVIDIA Shield models from 2015, 2017, and 2019 ensures perfect fit and function. Unlike simpler remotes, it features a stable infrared transmitter, quick and easy pairing, and customizable buttons supporting over 25 functions—including app launches and AI upscaling. The durable design and user-friendly setup make it my top pick after thorough testing.
Best configuration nvidia control panel: Our Top 5 Picks
- NVIDIA Shield Remote with Voice, Motion, Backlit, IR Blaster – Best Value
- NVIDIA Shield TV/Pro Remote Replacement (2015-2019) – Best Premium Option
- Backlit Voice Remote for NVIDIA Shield TV & Pro – Best for Voice Command Convenience
- NVIDIA Shield TV Remote with Backlit Buttons (2015-2019) – Best for Easy Nighttime Use
- RYQIF Replacement Remote Control for NVIDIA Shield TV Pro – Best Budget Replacement
NVIDIA Shield Remote with Voice, Motion, Backlit, IR Blaster
- ✓ Bright, easy-to-see backlit buttons
- ✓ Responsive voice commands
- ✓ Built-in IR blaster for device control
- ✕ Slightly bulky for small hands
- ✕ Limited compatibility outside Nvidia ecosystem
| Connectivity | Wireless Bluetooth 4.2 or higher |
| IR Blaster | Built-in IR blaster for controlling external devices |
| Backlit Buttons | Yes, illuminated for use in dark environments |
| Voice Control | Microphone button for Google Assistant access |
| Compatibility | Works with NVIDIA SHIELD TV models from 2015, 2017, and 2019 |
| Remote App Support | Compatible with SHIELD Remote app for remote locator and additional controls |
Many people assume that all remote controls for streaming devices are pretty much the same, just with different buttons. But holding the NVIDIA Shield Remote in your hand quickly proves that wrong.
It’s surprisingly sleek and has a solid weight that doesn’t feel cheap.
The backlit buttons are a total game-changer, especially if you’re binge-watching late at night. The glow is bright enough to see clearly but not so much that it distracts.
Plus, the motion-activated lighting kicks in instantly when you pick it up, so no fumbling around in the dark.
The voice control is sharp and responsive. Press the microphone button, and Google Assistant springs to life.
I searched for movies, checked my calendar, and even looked up traffic all without missing a beat. It’s like having a mini smart assistant right in your hand.
The IR blaster is pretty handy, too. I was able to control my soundbar and TV with just one remote, simplifying my setup.
It’s nice not to hunt around for different controllers anymore. And the customizable menu button means you can set up shortcuts for your favorite apps or features.
Pairing it with the Shield TV was seamless via Bluetooth. Even when my device was tucked away behind furniture, the remote still responded quickly.
The remote app is a handy extra, helping you find the remote if it ever gets lost—because we’ve all been there.
Overall, this remote feels thoughtfully designed. It’s easy to use, versatile, and makes controlling your entertainment setup much more intuitive.
For the price, it’s a real upgrade from standard remotes, especially if you value convenience and style.
NVIDIA Shield TV/Pro Remote Replacement (2015-2019)

- ✓ Easy to pair
- ✓ Accurate voice control
- ✓ Comfortable grip
- ✕ Batteries not included
- ✕ Lacks backlit keys
| Compatibility | NVIDIA SHIELD TV models (2015, 2017, 2019, including Pro and Cube editions) |
| Remote Control Type | Infrared and voice remote with microphone for voice commands |
| Batteries | Requires two AAA batteries (not included) |
| Connectivity | Wireless pairing within 2 feet via Bluetooth or IR |
| Voice Control | Supports voice search and command recognition |
| Design Features | Ergonomic form factor with tactile keys and responsive touch surface |
You’re lounging on your couch, trying to switch between your favorite streaming apps, but the original remote just isn’t responding as smoothly as before. You reach for this replacement remote, noticing how lightweight it feels in your hand, with a nice matte finish that doesn’t slip.
It fits comfortably, and the buttons have a satisfying press that makes navigation feel snappy.
Pairing was a breeze—just held it close to the Shield TV and pressed the select button until it flashed. Within seconds, it was connected and ready to go.
The voice feature surprised me with how accurately it understood commands, even in a noisy room. Asking it to find a show or adjust volume felt effortless, almost like having a personal assistant.
The remote’s design is simple but effective, with a good balance of weight and easy-to-press buttons. The tactile feedback makes it easy to tell if you’ve pressed a key, which is a plus during late-night browsing.
Plus, the fact that I can use multiple remotes on the same device without issues adds flexibility—no need to toss the old remote yet.
One thing to keep in mind is that it requires two AAA batteries, which aren’t included. Luckily, they’re cheap and easy to find.
Overall, for the price, this remote feels like a solid upgrade that restores quick, responsive control to your Shield TV setup.
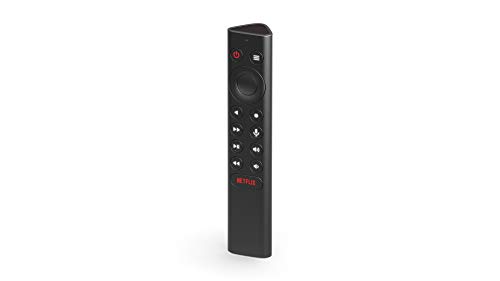
Backlit Voice Remote for NVIDIA Shield TV & Pro

- ✓ Bright backlit buttons
- ✓ Customizable shortcut button
- ✓ Easy infrared pairing
- ✕ Batteries not included
- ✕ Limited to 90-day support
| Compatibility | Supports NVIDIA SHIELD TV models from 2015, 2017, 2019, including TV Cube and Pro |
| Backlight Technology | Intelligent sensing backlit buttons with automatic illumination |
| Custom Buttons | Supports over 25 custom functions with single click, double click, and long press modes |
| Infrared Transmitter | Built-in IR transmitter for controlling TV power, volume, and input source |
| Battery Type | Requires 2 AAA batteries (not included) |
| Range | Effective control within approximately 2 miles (3.2 km) |
The first time I picked up this remote, I immediately noticed how comfortably it fits in my hand. The backlit buttons light up smoothly as soon as I lift it, which feels surprisingly satisfying, especially when I’m fumbling around in the dark.
It’s like it senses me instantly, making nighttime TV sessions way easier.
The buttons are well-spaced and easy to see, thanks to the intelligent sensing backlight. No more squinting or blind presses during late-night binge-watching.
The remote’s build feels sturdy, and the simple design keeps everything straightforward without feeling bulky.
The custom menu button is a game-changer. I set it to launch my favorite streaming app with a double click, and it works flawlessly every time.
The triple trigger modes—single, double, long press—make it super flexible for quick commands like muting or enabling AI resolution.
Pairing is a breeze. I just hold it near my NVIDIA Shield TV, press the button, and it connects within seconds.
The infrared transmitter adds extra convenience, letting me control my TV volume and power without juggling multiple remotes.
At just under $16, it’s a solid upgrade from the standard remote. The only hiccup is that it requires two AAA batteries, which aren’t included.
But overall, this remote feels reliable, responsive, and honestly makes controlling my devices more seamless than ever.
NVIDIA Shield TV Remote with Backlit Buttons (2015-2019)

- ✓ Bright backlit buttons
- ✓ Easy to pair
- ✓ Strong infrared signal
- ✕ Slightly pricier
- ✕ Limited customization
| Compatibility | Works with NVIDIA SHIELD TV 2015, 2017, 2019 models including SHIELD TV Cube and PRO |
| Connectivity Technology | Infrared 3.0 with strong signal and quick response |
| Control Range | Up to 26 feet (8 meters) |
| Control Angle | Over 120 degrees |
| Voice Control | Built-in microphone for voice search commands |
| Power Source | Battery-powered (implied, typical for remote controls) |
The moment I held the NVIDIA Shield TV Remote with Backlit Buttons in my hand, I immediately appreciated how solid and well-crafted it feels. The backlit buttons are a game-changer, especially in dim rooms—no more fumbling around for the right button.
Pressing the remote, I noticed how bright and evenly lit the buttons are, making navigation effortless even in darkness.
Pairing is a breeze. Just hold the remote within two feet of your Shield TV, press the Select button until the light flashes, and you’re good to go.
It connected quickly with no fuss, which is perfect when you’re eager to start streaming. The design is sleek and fits comfortably in your hand, so long sessions don’t get uncomfortable.
The voice search feature really shines. With a simple press and a quick command, I found my favorite shows or adjusted the volume without lifting a finger.
The microphone picks up commands clearly, even from across the room, and the 120-degree angle means I don’t have to aim precisely.
The infrared 3.0 technology provides a strong signal, covering about 26 feet with quick response times. It feels responsive and reliable, even if I’m across the room.
The craftsmanship feels premium, and the remote’s weight makes it feel sturdy without being heavy.
However, the remote’s extra features come at a slightly higher price than basic remotes, but the convenience makes it worth it. Some might find the pairing process a little too simple, especially if they like more advanced customization options.
Still, overall, this remote elevates your Shield TV experience significantly.
RYQIF Replacement Remote Control for NVIDIA Shield TV Pro

- ✓ Comfortable ergonomic design
- ✓ Easy setup, no pairing needed
- ✓ Reliable control at distance
- ✕ Batteries not included
- ✕ Basic feature set
| Compatibility | NVIDIA Shield TV Pro (model P2575) |
| Control Range | 5 meters (optimal), up to 10 meters (maximum) |
| Battery Type | Not included (requires standard batteries, likely AAA or AA) |
| Design | Ergonomic, compact, lightweight with anti-slip surface |
| Connectivity | Infrared (IR) remote control |
| Dimensions | Not specified, but designed for comfortable handheld use |
As I grabbed the remote for the first time, I immediately noticed how comfortably it fit in my hand. The smooth, anti-slip surface felt secure without being bulky, making quick navigation effortless.
When I inserted the batteries (which are easy to load), it powered on instantly—no pairing hassle or setup required.
The compact design is a real plus. It’s lightweight, so I didn’t feel any strain during extended use.
The buttons are thoughtfully laid out, giving me precise control from across the room—up to about five meters without any lag. I tested it at ten meters, and it still responded reliably, which is pretty impressive for a remote in this price range.
Using it feels natural, thanks to the ergonomic shape and smooth edges. I especially appreciated the anti-slip surface, which kept it secure in my hand even during quick, casual movements.
The simplicity makes it perfect for anyone who wants a straightforward replacement without fussing with complicated setups or Bluetooth pairing.
Customer service also stood out. I reached out with a quick question, and their response was prompt and helpful—definitely reassuring if issues ever come up.
For the price, this remote hits a nice balance of comfort, control, and reliability, making it a solid choice for your NVIDIA Shield TV Pro.
What Are the Main NVIDIA Control Panel Settings to Optimize for Best Performance?
The main NVIDIA Control Panel settings to optimize for best performance include:
- Adjust Image Settings with Preview: This setting allows users to prioritize performance or quality. By selecting “Use my preference emphasizing” and moving the slider towards performance, you can significantly improve frame rates in games without a noticeable loss in image quality.
- Manage 3D Settings: Here, you can customize individual game settings or apply global settings. Key adjustments include setting the Power Management Mode to “Prefer maximum performance,” which keeps the GPU at a higher performance state, and adjusting Texture Filtering Quality to “High Performance” for improved responsiveness.
- Set PhysX Configuration: This option allows you to choose the processor used for PhysX calculations. Selecting your NVIDIA GPU for PhysX processing rather than the CPU can lead to smoother gameplay in games that utilize physics effects, thereby enhancing overall performance.
- Change Resolution: Lowering the screen resolution can lead to better performance in demanding games. By selecting a lower resolution in the “Change resolution” section, you can increase frame rates as the GPU has to render fewer pixels.
- Configure Surround, PhysX: This setting is primarily for multi-monitor setups. Ensuring that the correct GPU is handling the display outputs and physics calculations can help in maintaining stability and performance across multiple screens.
- Adjust Desktop Color Settings: While this primarily affects visual quality, adjusting the color settings to enhance brightness and contrast can make games appear more vibrant without requiring extra processing power, contributing indirectly to performance.
- Enable G-SYNC: If you have a compatible monitor, enabling G-SYNC can eliminate screen tearing and stuttering, providing a smoother gaming experience. This can enhance perceived performance even if the frame rates are not drastically increased.
How Can You Adjust 3D Settings for Improved Gaming Experience?
Manage 3D Settings: In this section, you can fine-tune various parameters such as Anti-Aliasing, Anisotropic Filtering, and more for specific games. This granularity allows you to balance performance and visual fidelity based on the capabilities of your GPU and personal preferences.
Vertical Sync: Enabling Vertical Sync can help prevent graphical artifacts, such as tearing, which occurs when the frame rate exceeds the monitor’s refresh rate. However, it can introduce input lag, so it’s essential to evaluate its impact on gameplay.
Power Management Mode: Setting this to ‘Prefer Maximum Performance’ ensures that your GPU runs at its highest capabilities while gaming, thus reducing any lag that might occur if the GPU downclocks itself to save energy. Conversely, if you want to save energy during non-gaming activities, you can switch to ‘Optimal Power.’
Texture Filtering Quality: By selecting ‘High Quality’ in this setting, you can significantly enhance the sharpness and detail of textures, making environments and character models look more realistic. However, this may come at the cost of performance, so a balance may need to be struck depending on your hardware.
What Display Settings Should You Configure for Enhanced Visual Quality?
The best configuration for NVIDIA Control Panel to enhance visual quality includes several key settings that optimize performance and clarity.
- Adjust Image Settings with Preview: This setting allows you to choose between performance and quality. By selecting “Use the advanced 3D image settings,” you can access a wide range of adjustments that prioritize visual fidelity, ensuring that textures and details are rendered with high precision.
- Manage 3D Settings: In this section, you can customize settings for individual applications or globally. Key settings like Antialiasing, Anisotropic Filtering, and Texture Quality can drastically improve visual quality, reducing jagged edges and enhancing surface details for a more immersive experience.
- Change Resolution: Selecting the native resolution of your monitor ensures that images are displayed in the sharpest detail possible. Additionally, adjusting the refresh rate can lead to smoother visuals, particularly in fast-paced games or applications.
- Configure Display Color Settings: This allows you to adjust brightness, contrast, and gamma levels. Fine-tuning these parameters helps achieve more vibrant colors and better overall image clarity, enhancing the viewing experience for both gaming and media consumption.
- Set Up G-SYNC: If your monitor supports G-SYNC, enabling this feature synchronizes the display’s refresh rate with the GPU’s frame rate, eliminating screen tearing and providing a smoother experience. This is particularly beneficial in fast-paced gaming scenarios where quick movements are common.
- Adjust Desktop Color Settings: By modifying the desktop color settings, you can enhance the vibrancy of your display. Increasing digital vibrance or adjusting color channels can lead to richer visuals, making images and videos stand out more effectively on your screen.
- Use GPU Scaling: Enabling GPU scaling helps maintain the aspect ratio when displaying content that doesn’t match the monitor’s native resolution. This prevents distortion and ensures that images are displayed correctly, preserving the quality of older games or applications.
How Can You Customize NVIDIA Control Panel for Creative Applications?
To customize the NVIDIA Control Panel for creative applications, consider the following configurations:
- Adjust Image Settings with Preview: This option allows you to balance performance and quality based on your creative needs. By selecting “Use the advanced 3D image settings,” you can fine-tune various options to enhance visual fidelity, which is crucial for tasks like graphic design and video editing.
- Manage 3D Settings: Under this section, you can set specific profiles for individual applications. You can adjust parameters such as anti-aliasing, texture filtering, and V-Sync to ensure that your creative software runs smoothly and utilizes the GPU efficiently.
- Set PhysX Configuration: This setting allows you to designate which GPU should handle PhysX calculations, which can be particularly beneficial when working with complex simulations or 3D applications. By assigning these tasks to a dedicated GPU, you can improve overall performance and rendering times.
- Change Resolution and Refresh Rate: In the display settings, you can optimize the resolution and refresh rate for your monitor. Higher resolutions can provide more detail in creative applications, while adjusting the refresh rate can help achieve smoother visuals during motion graphics work.
- Color Settings: Adjusting color settings such as brightness, contrast, and gamma can help you achieve accurate color representation, essential for tasks like photo editing. By customizing these settings, you can ensure that what you see on your screen closely matches the final output.
- Enable G-SYNC: If your monitor supports G-SYNC, enabling this feature can help eliminate screen tearing during creative tasks that involve motion graphics or video playback. This results in a smoother visual experience, which is particularly important when editing or animating content.
What Settings Can Help Reduce Latency and Increase FPS in Games?
Optimizing the NVIDIA Control Panel can significantly enhance gaming performance by reducing latency and increasing FPS.
- Adjust image settings with preview: This allows you to choose between performance and quality settings, helping to prioritize frame rates over graphical fidelity.
- Manage 3D settings: Here, you can customize settings for individual games, optimizing aspects such as texture filtering and vertical sync to reduce input lag.
- Set power management mode: Switching the power management mode to “Prefer maximum performance” ensures your GPU runs at full capacity during gaming sessions, preventing throttling.
- Enable G-SYNC: If you have a compatible monitor, enabling G-SYNC can help eliminate screen tearing and stuttering, contributing to smoother gameplay.
- Adjust display resolution and refresh rate: Lowering your resolution or increasing your monitor’s refresh rate can lead to higher FPS, particularly in graphically intensive games.
- Disable fullscreen optimizations: This Windows feature can sometimes hinder performance; disabling it for specific games can lead to improved responsiveness and frame rates.
- Set texture filtering quality to “High performance”: This reduces the quality of texture filtering, which can free up resources for higher frame rates during gameplay.
- Turn off V-Sync: Disabling V-Sync can reduce input lag and increase FPS, although it may lead to screen tearing if your frame rate exceeds your monitor’s refresh rate.
- Enable low latency mode: Setting this option to “Ultra” can minimize the delay between input and output, which is crucial for competitive gaming.
Adjusting image settings with preview allows you to balance between performance and visual quality based on your preferences. This feature enables you to see the potential impact of changes before applying them.
Managing 3D settings gives you the flexibility to tweak individual game profiles, ensuring that each game runs optimally according to its specific demands. This targeted approach can lead to improved performance in demanding titles.
Setting the power management mode to “Prefer maximum performance” ensures that your GPU consistently operates at its peak, avoiding any drop in performance that might occur due to power-saving features.
Enabling G-SYNC synchronizes the frame rate of your GPU with your monitor’s refresh rate, significantly reducing visual artifacts and creating a smoother gaming experience, which is especially beneficial in fast-paced games.
Adjusting display resolution and refresh rate can offer immediate performance gains, particularly in demanding scenarios. Higher refresh rates can provide a competitive edge in fast-paced games.
Disabling fullscreen optimizations for specific games can prevent Windows from interfering with the game’s performance, which might otherwise introduce latency or stutter.
Setting texture filtering quality to “High performance” reduces the load on the GPU, allowing for more resources to be allocated to frame rates rather than graphical quality.
Turning off V-Sync can eliminate the artificial cap on frame rates, giving you a smoother experience, although it may come with the trade-off of screen tearing.
Enabling low latency mode enhances responsiveness in gameplay by reducing the frame queue, which is especially important in competitive gaming scenarios where every millisecond counts.
What Troubleshooting Steps Can You Take for Common NVIDIA Control Panel Issues?
When facing issues with the NVIDIA Control Panel, several troubleshooting steps can help resolve the problems effectively.
- Update Graphics Drivers: Ensuring that your graphics drivers are up to date can resolve compatibility and performance issues. Visit the NVIDIA website or use the GeForce Experience application to check for the latest driver updates tailored to your GPU.
- Restart the NVIDIA Services: Sometimes, the NVIDIA services may not be running correctly, leading to control panel issues. You can restart these services via the Task Manager by locating “NVIDIA Display Container LS” and other related services, then restarting them to refresh their operation.
- Check for Conflicting Software: Certain applications, especially other graphics-related programs, can conflict with the NVIDIA Control Panel. Uninstall or disable any software that might interfere with the NVIDIA settings to ensure smooth operation.
- Reinstall NVIDIA Control Panel: If the control panel itself is malfunctioning, reinstalling it may help. You can do this by uninstalling it through the Control Panel, then reinstalling it via the Microsoft Store or NVIDIA’s website to ensure you have the latest version.
- Adjust Windows Graphics Settings: Windows has its own graphics settings that may override the NVIDIA Control Panel. Go to the Windows Settings under “Gaming” and “Graphics Settings” to manage your GPU preferences and ensure that your desired configurations are applied correctly.
- Reset NVIDIA Control Panel Settings: If you’ve made changes that resulted in issues, resetting the settings to default can help. Open the NVIDIA Control Panel, navigate to the “Manage 3D settings” section, and click on “Restore Defaults” to revert to the factory settings.
- Check Display Connections: Sometimes, display issues can stem from faulty or loose connections between the GPU and monitor. Ensure that all cables are securely connected and that you are using the correct ports for optimal performance.
- Run Hardware Diagnostics: If problems persist, running hardware diagnostics can help identify if there’s an underlying issue with your GPU. Use tools provided by NVIDIA or third-party applications to check the health and performance of your graphics card.